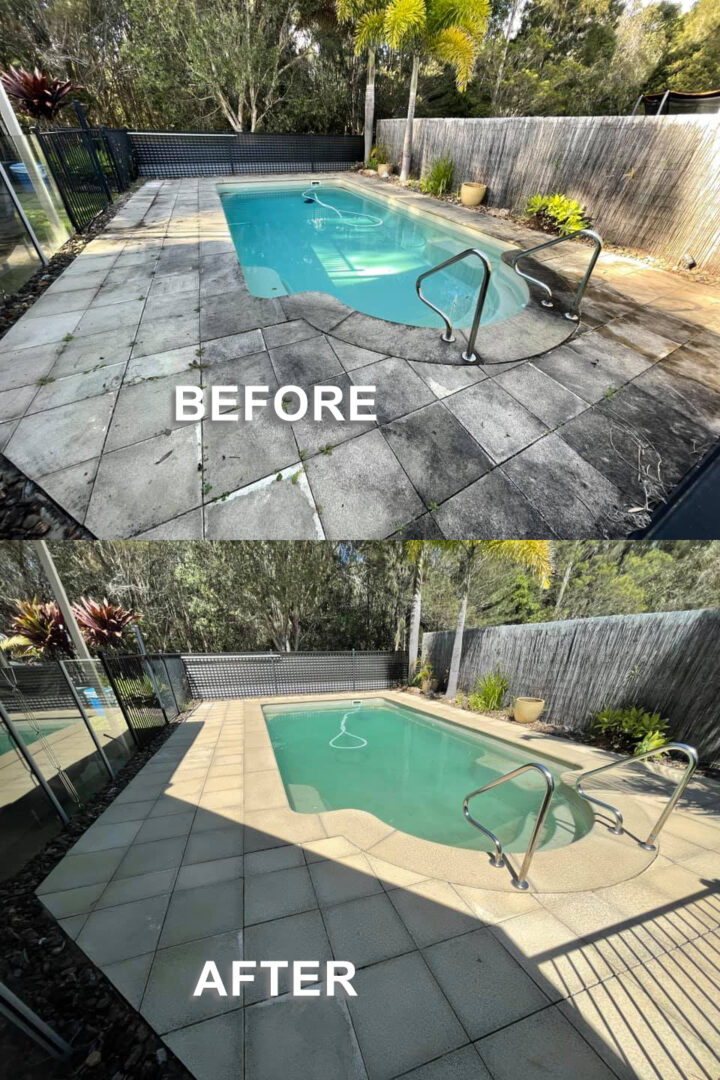
Mould can be a common issue on pavers, especially in damp or shaded areas where moisture accumulates. Removing mould promptly not only improves the appearance of your outdoor spaces but also prevents it from spreading and potentially causing damage to the pavers. Here’s a comprehensive guide on how to effectively remove mould from pavers:
- Safety Precautions:
- Before starting, wear gloves, safety goggles, and a mask to protect yourself from mould spores and cleaning solutions.
- Work in a well-ventilated area to minimize exposure to fumes from cleaning products.
- Cleaning Supplies:
- Water: Start with plain water to rinse off loose mould and debris from the pavers.
- Household Cleaner: Use a mild household detergent or soap mixed with water for light mould stains. Apply the solution directly to the affected areas.
- Chlorine: For stubborn mould stains, mix one part pool chlorine with three parts water. Ensure the area is well-ventilated and avoid using chlorine on coloured or delicate pavers as it may cause discoloration.
- Bleach Solution: For stubborn mould stains, mix one part household bleach with three parts water. Ensure the area is well-ventilated and avoid using bleach on coloured or delicate pavers as it may cause discoloration.
- BC36: a chemical used to remove stains from pavers.
- Steps to Remove Mould:
- Preparation: Sweep or brush off loose dirt and debris from the pavers.
- Apply Cleaning Solution: Spray or apply the chosen cleaning solution generously over the mouldy areas. Allow it to sit for 10-15 minutes to penetrate the mould.
- Scrubbing: Use a stiff brush or scrubbing pad to agitate the mould and lift it from the paver surface. Work in circular motions to effectively remove mould from crevices and joints.
- Rinse Thoroughly: This is very important – rinse the pavers thoroughly with clean water to remove all traces of mould, detergent, or bleach solution. Use a hose or bucket of water for rinsing.
- Alternative Cleaning Methods:
- Vinegar Solution: Create a solution of equal parts white vinegar and water. Apply to mouldy areas, let sit for 15-20 minutes, scrub with a brush, and rinse thoroughly.
- Baking Soda Paste: Make a paste of baking soda and water. Apply to mouldy spots, scrub gently with a brush, and rinse off with water.
- Preventing Future Mould Growth:
- Improve Drainage: Ensure proper drainage around pavers to minimize water pooling and moisture accumulation.
- Trim Plants: Trim back overhanging vegetation to reduce shade and improve air circulation around paver surfaces.
- Seal Pavers: Consider applying a sealant specifically formulated for pavers. Sealing helps protect against moisture penetration and reduces the likelihood of mould growth.
- Regular Maintenance:
- Inspect Regularly: Check pavers periodically for signs of mould or mildew growth, especially in shaded or damp areas.
- Prompt Action: Address mould promptly as soon as you notice it to prevent it from spreading and becoming more difficult to remove.
- Professional Help:
- Persistent Mould: If mould persists despite cleaning efforts, consider consulting a professional cleaning service or paver maintenance expert.
- Specialised Products: Some companies offer mould and mildew cleaners specifically formulated for use on outdoor surfaces, including pavers.
- Environmental Considerations:
- Dispose of Cleaning Waste: Dispose of cleaning solution and rinse water responsibly to prevent environmental contamination. Avoid letting cleaning products enter storm drains.
By following these steps and techniques, you can effectively remove mould from your pavers and maintain a clean and attractive outdoor space. Regular cleaning and preventive measures help prolong the life of your pavers and ensure they continue to enhance your home’s curb appeal for years to come.


